How to migrate your 8th Wall project into Studio
If you have an 8th Wall project you still care about, you do not have to rebuild it from a blank scene. Studio can import the export zip, convert what it can, and drop you into the scene editor.
This post is the practical version of what we walked through in September Office Hours. The Studio steps below match the current product UI (Overview → Create project → Import 8th Wall Project), verified end to end against a real Niantic Studio export.
If you would rather stay in your IDE and convert to a ViroReact project, that is a separate companion post (code-first path with the ReactVision MCP), publishing next.
What you get after migrating
Once an 8th Wall project is in Studio you can:
- Keep editing the scene visually in Studio
- Embed it in a React Native app with
StudioSceneNavigator - Share it instantly with Studio Scene Links (Web AR in the browser)
One ReactVision project you can take to phones, Quest, visionOS and the web from the same codebase, instead of staying locked to a web-only lineage.
Import into Studio
1. Export your 8th Wall project. Use a Buildable Code Export (zip). Niantic Studio-style exports that include an .expanse.json scene graph get the richest conversion. A-Frame / three.js style exports still get assets and image targets extracted, plus a migration report for what could not be mapped automatically. The Studio importer accepts an 8th Wall project export (.zip), up to 200.0 MB.
2. Open ReactVision Studio and go to your team Overview. Click Create project.
3. In the Create project dialog, set a project name (and optional icon / occlusion if you want), then click Import 8th Wall Project.
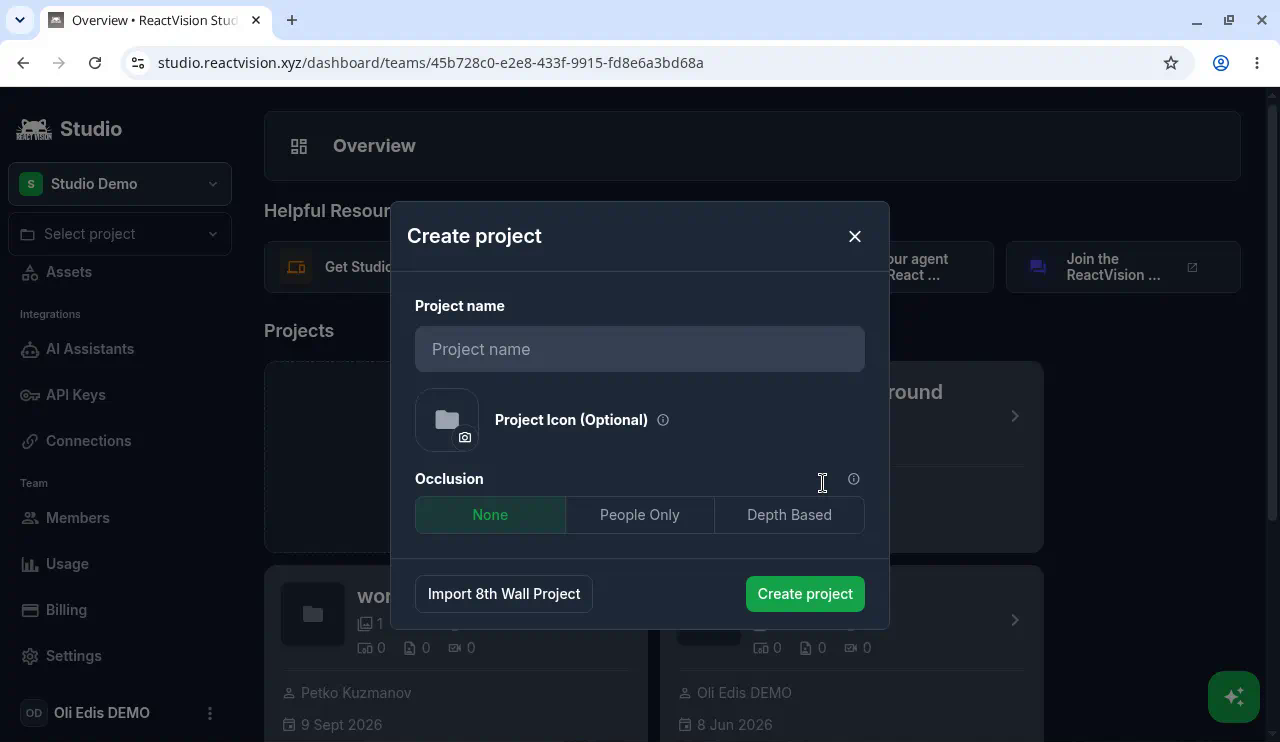
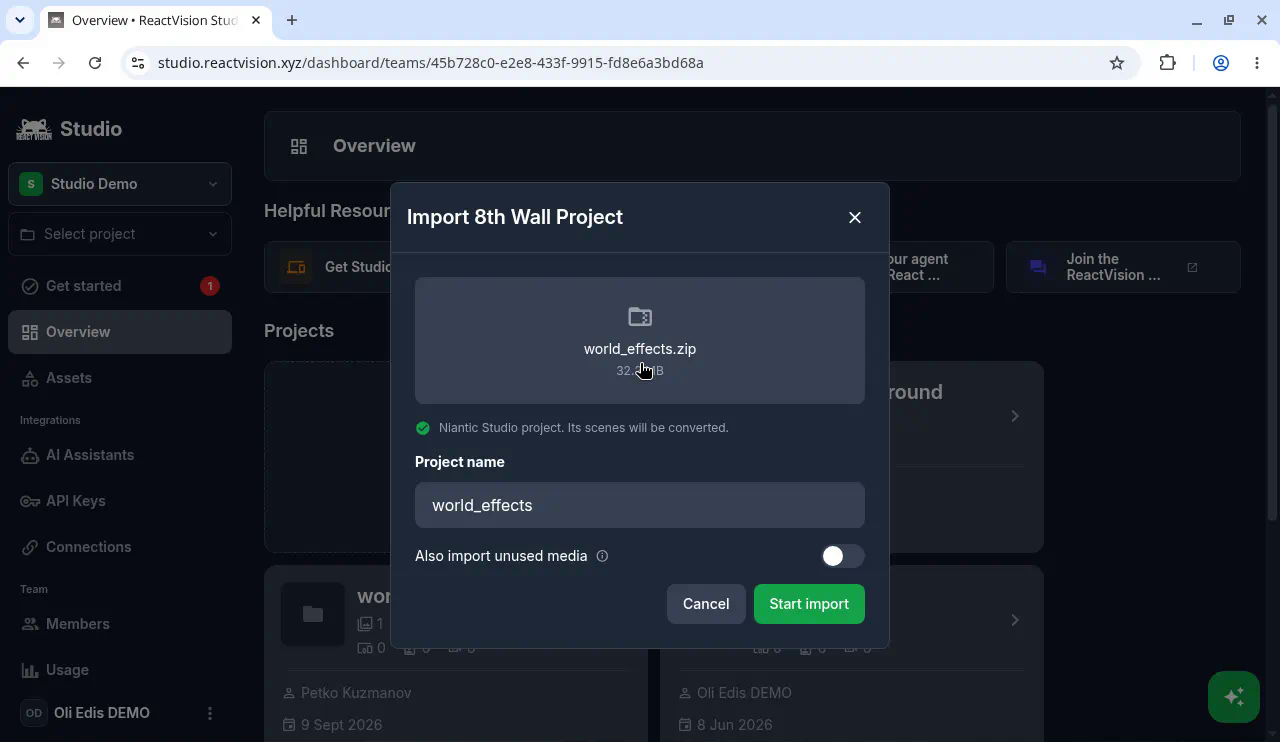
4. Upload the zip in the Import 8th Wall Project dialog. Studio will show the file name and size, and for Niantic Studio exports it confirms the scenes will be converted. You can toggle Also import unused media (off by default; unused files are then omitted). Confirm the project name, then click Start import.
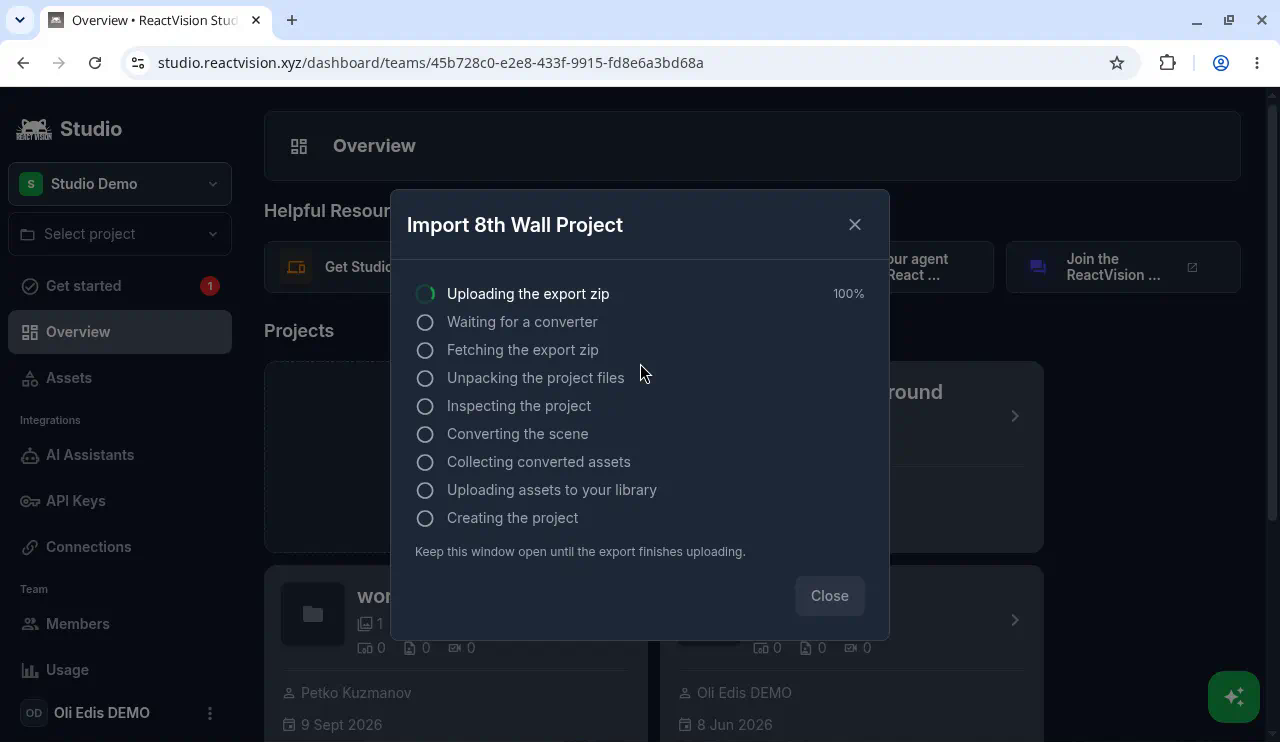
5. Keep the window open while the import runs. You will see a checklist: uploading the export zip, waiting for a converter, fetching, unpacking, inspecting, converting the scene, collecting assets, uploading assets to your library, then creating the project.
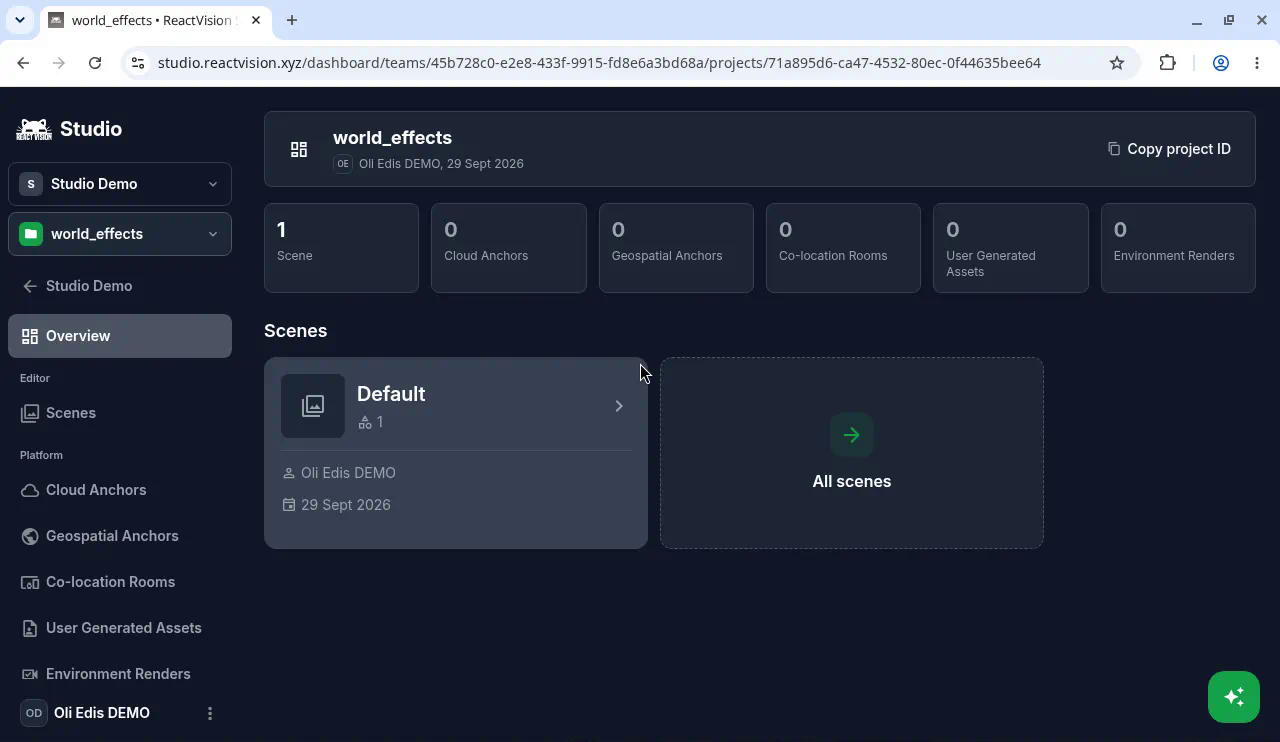
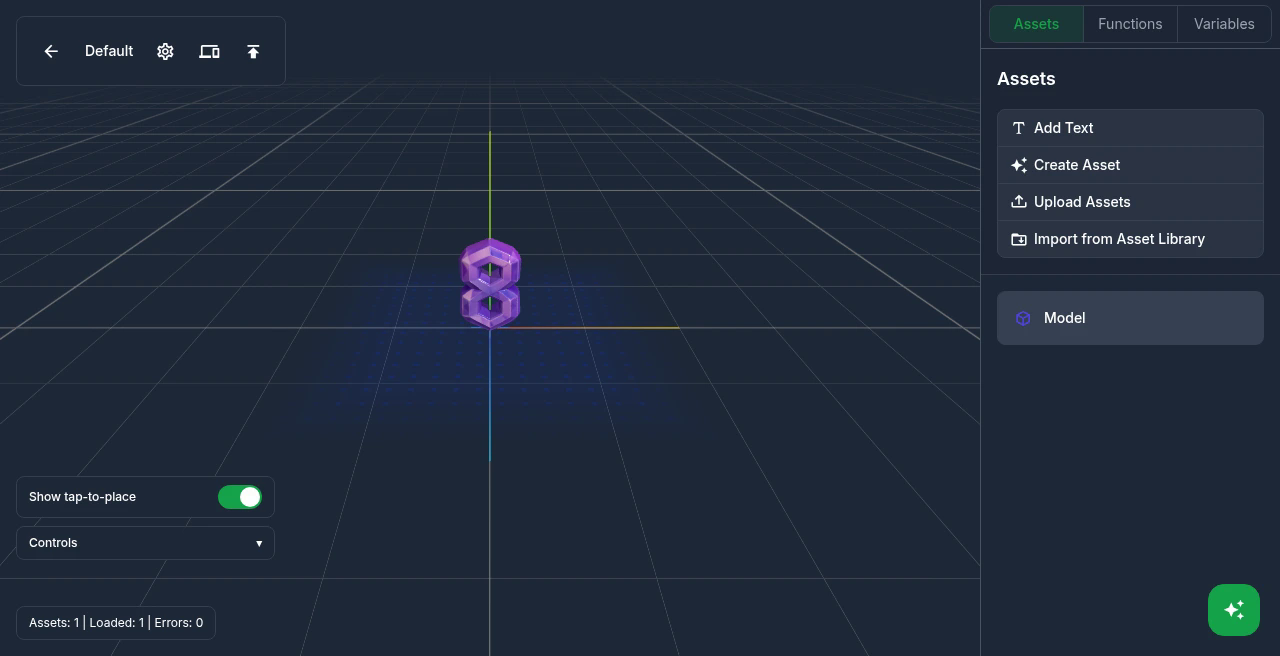
6. Land on the new project Overview, then open a scene. You get a Studio project with converted scene(s). Open a scene to review layout, materials and targets that mapped cleanly. In our example import the Default scene loaded a 3D model in the editor. Anything the converter could not express shows up as conversion warnings (common ones: lights / UI that were skipped, occlusion geometry, and custom code components).
7. Choose how you ship it: keep iterating in Studio, publish a Scene Link for browser AR, or drop StudioSceneNavigator into your app pointing at the Studio scene.
That last option is the one we'd recommend for production apps. Studio stays your content CMS. Your React Native binary stays your container. You update the scene without waiting on a store release when the change is content-only.
Scene editor after a successful import (viewport with the converted model, Assets panel showing Loaded 1 / Errors 0):
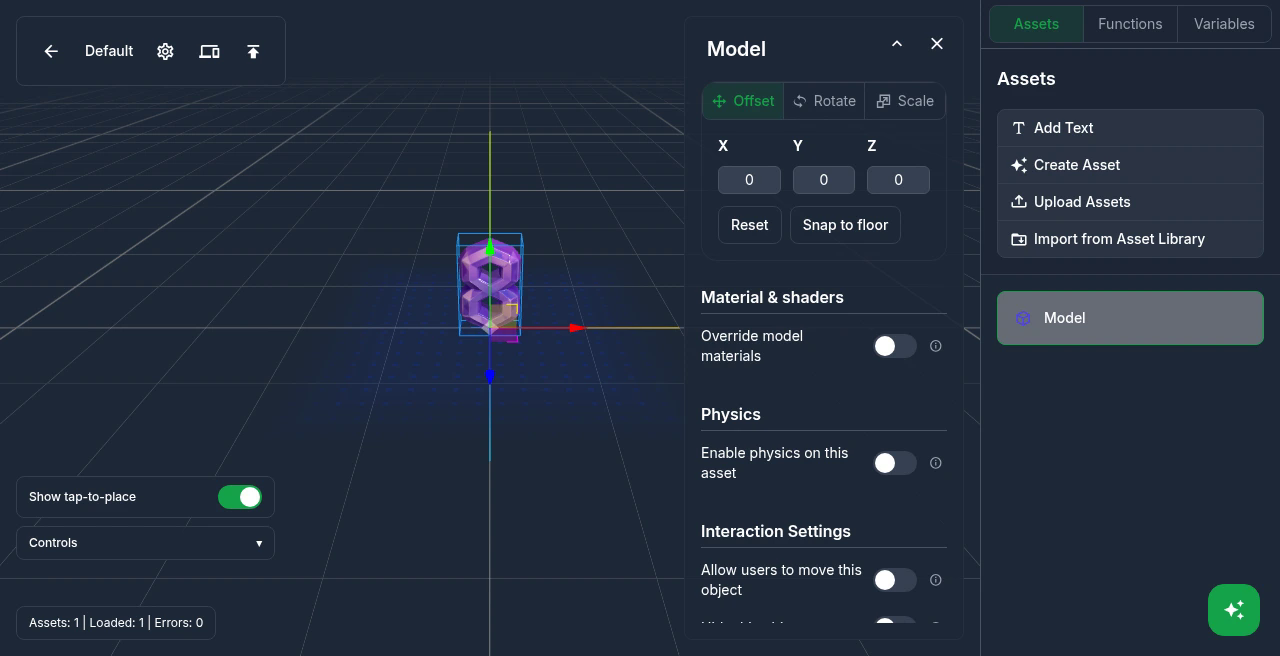
Selecting the model in the inspector:
Prefer the code-first path?
That lives in a companion post with the ReactVision MCP. Studio is the visual path. The MCP is the repo path. You do not have to do both.
What to expect
- Not every 8th Wall feature has a one-to-one ViroReact twin. Image targets and common scene graph pieces map well. Lights, UI, occlusion geometry and custom code components are often skipped or warned. Read the conversion warnings.
- Web vs native. An 8th Wall experience was born in the browser. After migration you can stay on Web AR via Scene Links, or step up to native ViroReact when you need Quest, visionOS, co-location or Platform anchors.
StudioSceneNavigatorgot a large batch of rendering improvements around the 3.0 window (fifty-plus). Migrated scenes benefit from that work when embedded in an app.- Test on a phone early. Especially if your next step is a Scene Link. Desktop previews are useful; device cameras tell the truth.
Suggested order of operations
- Export from 8th Wall.
- Import into Studio.
- Publish a Scene Link and validate the experience with stakeholders.
- Wire
StudioSceneNavigatorinto your app when you are ready for a native container. - Layer on Platform features (Cloud Anchors, Geospatial, co-location) only where the product actually needs them.
You do not have to do all five on day one. Getting a faithful scene into Studio is already a win.
Help and next steps
- Studio: studio.reactvision.xyz
- Code-first / MCP convert: companion post (publishing next)
- Community: Discord via reactvision.xyz
- Broader 3.0 context: the Office Hours recap and the ViroReact 3.0.0 ship post
If you get stuck on a specific export that will not convert cleanly, send it our way. Migrations get better when we see real projects, not just demos.
Oli
Upcoming events
Events that fit migrations, hackathons and life after the single-platform web AR stack. Full details: reactvision.xyz/community/events
- Ctrl+Space: Expo x ReactVision Hackathon - San Francisco 3 October 2026; London 8 October; Toronto 10 October; Bengaluru 18 October
- Meetup, 8 October, London: Beyond the App: What Comes After Mobile?
- Virtual, 10 November: The Next Platform Shift
- Virtual, 17 November: Building Platform-Agnostic AR/VR